Modern

Showing posts with label Recipes. Show all posts

Thursday, October 22, 2015

Recipe: Breaded Oven Baked Salmon

I tried out a new salmon recipe this week and promised to post it if it were a success.

Well, it was a HUGE success, so here it is...

Typically I bake salmon about once a week. I use the same recipe almost all the time because I know the kids love it. But the main ingredient in that recipe is soy sauce, and when I went to make it this week... we were all out of soy sauce! Oops!

Off to Google I went.

I found a few "oven baked salmon recipes" that sounded delicious, but I was missing at least one ingredient in almost every one. So I improvised and created this delectable creation:

Breaded Oven Baked Salmon

Ingredients:


  • 4 Salmon filets
  • 1 cup Italian bread crumbs (or Panko bread crumbs with some seasoning would also be great)
  • 1 1/2 Tablespoon Honey
  • 2 Tablespoons Dijon mustard
  • 4 Tablespoons melted Butter
  • EVOO for drizzling
Directions:

1. In a shallow dish, whisk together honey, Dijon mustard and melted butter until combined.

2. Place breadcrumbs in another shallow dish

3. Dredge salmon fillets in mustard/butter mixture making sure to cover all sides, then place in breadcrumbs and cover all sides with breadcrumbs. Place in a greased shallow baking dish.

4. Sprinkle any remaining breadcrumbs over salmon fillets, then drizzle with EVOO.

5. Bake at 400 for 12-15 minutes or until salmon is easily flaked with a fork.

Serve with a green veggie and some brown rice and you have a delicious, simple, healthy dinner.
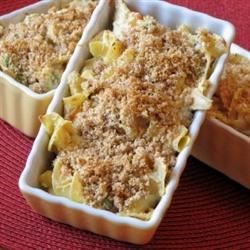
(Sorry, I forgot to take a photo of the cooked salmon, but this is exactly what it looked like)
YUM!

Tuesday, September 29, 2015

This and That

Hey y'all!

I've got a little bit of this and that for you today. My apologies if I'm all over the board, but sometimes there's just not one topic that fits all the random thoughts going on in my brain. :)
Here we go...

I've been totally slacking on taking pictures of family meals lately, but I promise it's on my "to do" list. I've thrown together a few fun recipes lately that are - as always - simple and yummy. I am planning to post a new recipe later this week, so hang tight!

In the meantime, if you're enjoying some cooler fall temperatures (I'm jealous) this comfort food casserole is very tasty. I made it last week and served it with a huge helping of roasted veggies on the side and the boys loved it. It would also make an excellent casserole to bring to a new mom.


Keeping with the food topic, we're headed into my favorite few months of the year and with those months comes lots of parties. I love hosting kids parties because they're a lot more casual and the kids generally love whatever you serve as long as there are some desserts involved. :)

I saw this cute idea the other day:
It's simply powered doughnut holes skewered on to sticks. Then they used white icing to attach candy eyeballs (I saw these candy eyeballs at Target this week). If you want to up the "gross factor" you could serve it with red raspberry sauce like they did here. Ewww! I know my kids would love everything about this.

My neighbor, Kathie, recently set up an ice cream bar at her house for both adults and kiddos. Instead of dirtying up a bunch of bowls, she used a cupcake pan to divvy out all the toppings. Brilliant! I will definitely be stealing this idea.

Moving on to my next favorite topic... shopping!

If you know me, you know I love shopping. 

And not just clothes shopping. I love to shop for pretty much anything... stuff for the house, stuff for my kids, stuff for my friends, stuff for my mom... pretty much anything.

I recently got a coupon in the mail from Victoria's Secret for $10 off any purchase, so I went in thinking maybe I'd pick up a new bra. But when I saw this sleep shirt, I knew it had to be mine! My kids know that it's risky to talk to mom in the morning before I've had my coffee. ;)
This is now my absolute favorite piece of clothing. I wish I could wear it to Publix and the gym and to the park with my kids. Ha! Ha!

After reading several of my favorite bloggers rave about this Nest Pumpkin Chai candle, I decided to mail one of them to my dear friend in Texas who is going through a lot right now. She could not say enough good things about this candle when she received it. Maybe I need to buy one for myself too...


In an attempt to spur on some cooler weather (and because it was on major sale) I bought one of these Bobeau Long Cardigans from Nordstrom. 
I bought the black and white striped one, which I no longer see on their web site (maybe because it sold out?), but let me tell you... I will be living in this cardigan! It's so lightweight and soft. I love how flowy it is. Definitely one to keep your eye on for when it goes on sale again.

And last but not least, I want to show a couple quick pics of our "finished" master bath. I am SO excited to have this project completed. The only thing left to do is pick out fun things like bath mats and soap dispensers (I've already taken back two sets of each!). 

So without further adieu...
My talented Aunt Cheryl painted that gorgeous painting above the tub. I LOVE how it adds a pop of color.
We went with a frameless shower - despite the ridiculous cost of it (what is it made of pure gold!?!?) and I'm so happy we did. It opens up the room so much.
Promise I'll post more pictures of the room once it's totally completed. Maybe I'll even have one of my talented photographer friends take them so you can actually see the true colors of everything (I desperately need to work on my camera skills). 

I'm also excited to be working with a super talented interior designer for an e-design consult to finish off our master bedroom.

While I'm thrilled with the paint colors we chose and our new headboard and curtains, I need some expert advice on lighting, rug, side tables, and so much more. I will let you know how things go after we meet up this week. So much fun stuff going on!

I hope you enjoyed my scattered brain today. Have a great rest of the week!

Thursday, May 14, 2015

Recipe: Slow Cooker Boneless Pork Chops

Happy Friday everyone! Dropping in real quick today to share a delicious recipe that works great for a busy weeknight meal.
Kinda embarrassing to admit, but I had never made boneless pork chops before. And I rarely make bone-in pork chops because I usually over-cook them and they come out tough.
But Publix recently had boneless pork chops on sale, so I thought I'd give them a try.
My past experience with tough meat made me think that possibly cooking them in the Crock Pot would yield a more tender meat. Boy, was I right!
These were fork tender and so flavorful!

Here's the recipe:

Savory Slow Cooker Pork Chops

Ingredients:

  • 4 Pork Chops (I used boneless, but I'm sure either one would be great)
  • 1/4 cup EVOO
  • 1 cup chicken broth
  • 2 cloves garlic, minced
  • 1 tablespoon garlic powder
  • 1 tablespoon paprika
  • 1 tablespoon poultry seasoning, I used McCormick's
  • 1 teaspoon dried oregano
  • 1 teaspoon dried basil
  • Salt & Pepper to taste


Directions:
1. Spray Slow Cooker with non-stick cooking spray.
2. In a bowl (or straight in the Slow Cooker), whisk together all of the ingredients
3. Cut a small slit into the middle of each pork chop and place in the Slow Cooker.
4. Cover and cook on high for 4 hours, or low for 6-8 hours. Periodically baste the pork chops with the liquid.


I served these over mashed potatoes and the boys went crazy for them! They are seriously so flavorful. I did however forget to take a finished photo - sorry! But trust me, it's delicious.

I will warn you though, when it's cooking, it's a pretty strong garlic/paprika smell. So if you don't want your house smelling like that all day, I recommend plugging your Slow Cooker in on your porch. That's what I do when I'm cooking something particularly fragrant, and it works great! :)

Hope you will try this recipe sometime next week and let me know how it turns out. Maybe even send me a photo. ;)

Tuesday, April 21, 2015

Recipe:Italian Herb Baked Meatballs

My little family loves spaghetti and meatballs.

I've made them a lot of different ways, using a lot of different recipes (and occasionally I buy the pre-made ones at Publix because I'm feelin' lazy). 

My guys can usually tell the difference between meatballs made with beef versus ground chicken or turkey. I think it's a consistency thing, although I agree that they do taste different. I don't know that I personally have a preference, but my boys love them some beef!

So, in a compromise, I told Brian I would make meatballs with ground beef once in a while, but that it would have to be organic, grass-fed ground beef, which is $7.99/lb.

For those of you who do not buy organic meat, you can pick your jaw up off the ground now. :) Yes, I know it's about 3x the price of "store brand" ground beef, but after watching the movie, "Food, Inc." I just can't buy it and squish it between my fingers knowing how it was farmed.

Okay, I'm stepping down off my soapbox now...

SO... all of that being said, my favorite brand of organic grass-fed beef was on sale at Publix last week so I made my men some real-deal meatballs. And if I'm gonna spend that kind of money on the meat, you better believe I want the recipe to be amazing.

I did some research and found a recipe that had raving reviews from hundreds of people. But it was a new way of cooking meatballs, which I had never tried before... baking them!

I realize a lot of people have been doing this for years, but I've always cooked them in a skillet. I love the way they taste, but man oh man... the grease! I hate it! It makes such a big mess, I would just rather make something else.

But baking the meatballs (on parchment paper no less) left very little clean up and the meatballs turned out fantastic! So, I adapted the recipe a little bit to my taste and it turned out fantastic!

Here's my new "go-to" meatball recipe:

Italian Herb Baked Meatballs

Ingredients:

  • 1 lb. ground beef
  • 1/2 cup Italian breadcrumbs
  • 1/4 cup FRESH grated Parmesan (plus additional for topping)
  • 1/4 cup grated mozzarella cheese
  • 3 cloves of garlic, chopped
  • 1 Tbsp. dried minced onion
  • 1 Tbsp. fresh rosemary, chopped
  • 1 Tbsp. fresh parsley, chopped
  • 1 Tbsp. fresh basil, chopped
  • 1 tsp. kosher salt
  • 1/4 tsp. fresh ground black pepper
  • 1 large egg, lightly beaten
*If you do not have fresh herbs, you could sub dried herbs instead.

Instructions:

1. Preheat oven to 375 degrees and line a cookie sheet with parchment paper.

2. In a large mixing bowl, lightly beat egg and then add all remaining ingredients. Gently combine, but do not over mix or this will result in tough meatballs.

3. Roll approx. 2-3 Tbsp. sized balls and place on lined baking sheet.
4. Bake for 20 minutes.

5. Serve over whole wheat thin spaghetti and top with your favorite spaghetti sauce. And of course some additional shredded Parmesan cheese and chopped basil if you're feelin' fancy.

You could make these meatballs ahead of time and put them in the crock pot with your favorite spaghetti sauce and let them marinate and soften for a few hours. Then cook your spaghetti right before you're ready to eat and, voila! super easy meal prep.
Eliminating that greasy mess has been a total game-changer for me. I hope you will try this recipe and let me know what you think!


Monday, April 13, 2015

Scenes from the Weekend & An Updated Recipe

Thank you so much for all of your positive and encouraging comments and emails regarding my last post about some of the behavior challenges we're facing with our children right now. It's so nice to be able to share not only the fun things on this blog, but also the difficult things, and know that there will be people who will encourage us along the way. So, thank you!
.........................................................................................
This past weekend was mostly spent around the house, which is rare, and yet so good. 

Friday evening Brian was still in Texas for a work trip, so the boys and I went to our friend's new house for an evening of swimming & pizza. The kids had a ball and I loved seeing her gorgeous new home.

I woke up to Brian climbing into bed around 1 a.m. and it felt so good to reach over and grab his hand, knowing he was home. I don't sleep well when he's out of town, so it's a good thing he rarely travels.

Saturday morning, we split up and Brian took Payton to serve with our church's "Second Saturday" community service project; and Parker and I went downtown to participate in a charity 5K walk for our good friend who has Juvenile Diabetes.
All of us walking under a major roadway in downtown Tampa. It was so weird to be walking on these streets!

Parker and I walking along beautiful Bayshore Blvd.

We all had wonderful experiences and as they say, it really does feel good, when you do good for others. 

After some seriously-needed showers, the whole fam went out to a late lunch at one of our favorite water-side restaurants. This gorgeous bird - lovingly named "Fred" by the restaurant employees - sat next to our table and patiently watched until Parker inevitably dropped a sweet potato fry on the ground. To which Fred quickly gulped down his throat.

The rest of the weekend we took it pretty easy and just enjoyed lounging around the house watching the Masters and taking it easy. Sunday afternoon we got our giant inflatable pool out for the kids. Parker in particular gets so excited about this pool. And I have to admit, it is pretty fun to have!

Last but not least, I wanted to share an updated recipe with you.

I've posted this Italian Chicken Recipe before, but this time, I updated it and made it a Greek version. It was so delicious and SUPER easy.

Baked Greek Chicken

Ingredients:
  • 3-4 Boneless, skinless chicken breasts
  • 1 can petite diced tomatoes
  • Jar of pitted kalamata olives
  • Container of crumbled feta cheese (I used the tomato/basil version)
  • Greek salad dressing (I made my own using Ina Garten's recipe, found here)
  • Oregano

Directions:
  1. Spray casseroled dish with non-stick cooking spray and place raw chicken in dish. Pour Greek dressing over chicken.
  2. Dump can of tomatoes over the chicken, then sprinkle with feta cheese, olives and oregano.
  3. Bake at 375 degrees for 30-40 minutes or until chicken is cooked through.
Let me tell you... despite the recipe being SO easy... it explodes with flavor! If you like Greek salads, you will love this dish. Sadly, I had to scrape off most of the toppings for my children, but they still said the flavor was delicious. :) I served it with rice, but I bet it would be great with Cous Cous too.

That's all for today. I hope you'll return later this week when I re-visit my new series, "Marriage & Family: Creating Harmony in the Home," when I'll be addressing age-appropriate chores.

Have a great week everyone... go out and be fabulous! ;)

Monday, March 23, 2015

Recipe: Taco Soup

Today is one of those wall-to-wall days when the moment my feet hit the ground this morning, I knew there would be little slowing down.

On days like these, I always look for a recipe that can be assembled quickly, ahead of time, and that requires minimal clean up.

Enter...Taco Soup.

This recipe is so simple, it's not even really a recipe. But I thought I'd share it just in case you have a busy day lined up this week and still want to serve your family a hearty meal at the end of the day.

Taco Soup

Ingredients:

  • 1 lb. ground beef or chicken
  • 1 envelope of taco seasoning
  • 1 can sweet corn, drained
  • 1 can pinto beans, drained
  • 1 can kidney beans, drained
  • 1 can black beans (Do not drain)
  • 1 can of petite diced tomatoes (Do not drain)
  • Shredded cheese
  • Fritos or Tortilla chips
*Optional ingredients: Sour cream, cilantro, green onion, jalapeno slices

Directions:
1. Brown your meat in a skillet (I like to use ground chicken for this recipe and I cook it in a non-stick skillet with a tablespoon or two of coconut oil... and no, it does not taste like coconuts, it's just a super healthy alternative to vegetable oil).

2. Spray your slow cooker with non-stick cooking spray and dump in all the canned ingredients plus the taco seasoning. Then add in the browned meat. Stir everything around until all the ingredients are swimming happily together in their slow cooker hot tub.


3. Cook on low for at least 3 hours, but up to 6 hours will make it even better.

I like to really pile on the toppings with this recipe. I add sour cream, diced green onions, shredded cheese, diced jalapenos, and even Fritos! If you don't have Fritos, tortilla chips make great "spoons" for dipping. 

Image result for taco soup

Hope you enjoy this recipe on your next busy day. As for me, I'm off to help with math homework, finish the laundry, prep for our Cub Scouts meeting, and entertain two rambunctious sweet boys the rest of the afternoon. Is it 5 o'clock yet? Ha.. ha..ha.,.

Sunday, March 15, 2015

St. Patty's Recipe: Super Easy Corned Beef

Popping in quickly today to share my favorite St. Patrick's Day recipe.

As you know, Corned Beef & Cabbage is the traditional Irish meal served for St. Patrick's Day. But roasting it can be tricky because you don't want it to be tough, but you definitely want to make sure it's cooked all the way through.

My solution to this, is using ye ol trusty Slow Cooker! (That sounded more Scottish than Irish, but stick with me).

Here's how you make perfectly cooked Corned Beef and all the sides that go along with it in a few easy steps:

1. Spray your slow cooker with a non-stick cooking spray.
2. Place the following items into the slow cooker:

  • 1 small onion cut into bite-sized pieces
  • 1 bag of baby carrots (or a bag of regular carrots cut into 2-inch pieces)
  • 1/2 head of cabbage, coarsely chopped
  • 7-10 small red potatoes, quartered
3. Pour 3 cups of water on top of the veggies and then (1) 6 oz beer (Guiness or Harp is always a fun choice for St. Patrick's Day).
4. Place the Corned Beef brisket on top, sprinkle it with the enclosed spice packet.
5. Set the Slow Cooker to high and cook ALL DAY (at least 8 hours). One hour before serving, stir ingredients and let cook for one more hour.

This should result in a deliciously tender corned beef with all the sides ready to be served right along with it. Pair it with a loaf of crusty bread and some rich Irish butter, and you've got yourself a super easy, and very traditional Irish meal.

Happy St. Patrick's Day everyone! Hope you don't get pinched. ;)

Image result for someecards st. patricks day

Thursday, March 5, 2015

Bunny Bars: An Easter Treat

I almost feel guilty posting this recipe because if you make them... you will want to eat them all.

I first saw this recipe on Pinterest and thought, "Well those look amazing. But nothing I've made from Pinterest ever turns out the way it looks, so I doubt they're that good."

Then I saw a similar recipe on another blog and it looked just as good, so I thought, well, I'll do a "test batch" and see how they turn out. Oh man. They're so easy, and so good.

The ingredients are very basic, and you don't even need an electric mixer. Just make sure you completely soften your butter. Do not microwave it to soften it, you need to let it come to room temperature. This may require taking it out of the fridge in the morning if you're making them in the afternoon, or even the night before. Butter will not go bad sitting on your counter. Promise.

Okay, so here's the recipe...
Ingredients:
  • 1 cup flour
  • 1/2 tsp salt
  • 1/2 tsp baking powder
  • 1 cup sugar
  • 1/2 cup (1 stick) SOFTENED butter
  • 2 eggs, lightly beaten
  • 1/2 tsp vanilla
  • 1/2 cup chocolate chips
  • 1 cup Cadbury mini eggs
  • *Optional: 3/4 cup chopped walnuts
Directions:
1. Preheat oven to 350 and grease a 9x9 baking dish.
2. Sift together the flour, baking powder, salt and sugar.
3. In another bowl, lightly beat the eggs with a fork, and then add them to the dry ingredients.
4. Add the softened butter and vanilla to the dry ingredients and mix well with a spoon to combine.
5. Pour the batter into the baking dish and spread evenly.
6. Bake for 30-35 minutes.

They kind of taste like a cross between cake batter and cookie dough with giant pieces of chocolate hiding inside. Just a warning...they're addictive, so cut them into small pieces. ;)

Monday, February 23, 2015

Mouthwatering Slow Cooker Pork Roast

Hello everyone! I hope you had a fantastic weekend.

We spent most of ours bouncing around from one birthday party to the next. In total, we celebrated FIVE birthdays in one weekend. Phew! That's a lot of celebrating.

Today, I wanted to share a delicious recipe that I came across last week when trying to figure out what to do with the pork loin roast I had purchased because it was on sale.

I am pleased to report that my entire family loved this recipe and the leftovers were just as yummy. This would make a super easy weeknight meal, or could be dressed up with some fancy side dishes and made for company. Either way, I hope you'll give it a try next time pork loin is on sale at your grocery store.

Mouthwatering Slow Cooker Pork Loin

Ingredients:
As simple as this may seem, the only ingredients are:
  • Approx. 2 lb. pork loin roast
  • 3 tablespoons of soy sauce
  • 1 packet of dry onion soup mix
  • 3 tablespoons of minced garlic
  • 3/4 cup dry red wine
  • 1 cup water
Directions:

Just like the ingredients, the directions are super simple!

1. Pat your pork loin roast dry and place it inside a greased slow cooker.
2. In a bowl, combine soup mix, red wine, water and soy sauce. Mix to combine, then pour over the pork loin, turning to ensure the entire roast is coated with the liquid.
3. Spread minced garlic on the top of the pork.
4. Cover and let cook on low for 10 hours, or high for 6-8 hours depending on the weight of the pork.

5. Once it is fork tender, shred the meat and serve with the remaining sauce.
I served ours with a huge pan of roasted vegetables. It was the perfect compliment to the pork.


I hope you and your family enjoy this recipe as much as we did.

I'll be back later this week with some fun St. Patrick's Day ideas. Stay tuned!

Tuesday, February 17, 2015

Recipe: Slow Cooker Chicken Sausage & White Bean Stew

I'm still coming off my Valentine's weekend high.

I gotta say... I love my kids with all my heart and soul... but spending a weekend alone with my man was just what the doctor ordered.

We went out to dinner and then attended an amazing concert...

We slept in, drank second-cups of coffee, lazed around the house, did random errands with no time limits or children yelling, "WHERE are we going now?!?" or "Are we done yet?!?!"

It was a weekend full of adult "me time" where we did whatever we felt like doing, Quite nice, I gotta say.

My love showered my with my favorite flowers on Valentine's morning:
And I got him a new cheese platter/cutting board, hand-fired with a very inside joke... don't ask... it would take way to long to explain. :)

It was a wonderfully relaxing weekend, and I was super excited to hug my babies (can I still call them that??) on Sunday. But as all holidays are... this one passed far too quickly, and now we're back to the real world. :)

And since the week is in full gear, I thought I'd share a very quick, SUPER easy, family-friendly weeknight meal with you.

My boys love this so much, and I love it too because it's healthy, takes minutes to assemble, and it is comfort food at its best.

Here's my recipe for Slow Cooker Sausage & White Bean Stew:

Ingredients:

1. (2) Cans of Cannellini beans
2. 3/4 - 1 cup chicken stock (homemade preferred of course) :)
3. al fresco chicken sausage I chose the sundried tomato version, but they are all delicious! And I love that I can pronounce and understand all of the ingredients on the label (chicken meat, sundried tomatoes, basil, etc. - NO by-products or fillers!)
4. Pasta - shells are my top choice for this dish, but penne or bowtie works great too.
5. Parmesan cheese and any Italian herbs of your choosing

Directions:
1. Thinly slice the chicken sausage (it's already fully cooked, so you don't need to saute it unless you want to), and place it in the bottom of your sprayed Slow Cooker. Then generously drizzle with EVOO.

2. Drain & rinse the cannellini beans and dump them on top of the sausage.
3. Sprinkle with any Italian herbs of your choosing. I did some dried thyme, garlic salt, and basil.
4. Pour 3/4-1 cup of chicken broth on top until it almost covers the beans.
5. Cook on high for 4 hours or low for up to 6 hours.
6. Cook pasta and then ladle the sausage/bean mixture on top of the pasta and top with shredded Parm.
7. ENJOY!!
I love serving this with roasted broccoli and a dry white wine. It's a crowd pleaser for sure. And one that you'll want to come back to any time it's chilly outside and you want some savory comfort food.

Cheers everyone!

Wednesday, February 11, 2015

Angel Chicken: A Family Favorite Recipe

I could have sworn that I shared this recipe on my blog before. Maybe because I've emailed it to so many friends over the years that I thought I had posted it here as well. But I just did a search and can't find it, so I'm going to post it (again??) in case you are not familiar with this family favorite.

This recipe is so simple, yet so delicious. My sister-in-law sent it to me years ago and it has since become a regular menu item on our table.

Here are the ingredients you will need (plus chicken and pasta):
First, get out your trusty slow cooker and spray it with a non-stick cooking spray. Place 4-6 chicken breasts in the slow cooker (frozen or thawed, it doesn't matter).

Second, dump the following ingredients into a saucepan on your stove and cook while stirring over medium high heat until well combined:

  • One can of condensed cream of chicken/mushroom or golden mushroom (my favorite) soup
  • 1/2 stick of butter
  • 1/2 container of onion & chive cream cheese
  • 1 packet of Good Seasons Italian salad dressing dry mix
  • 1/2 cup dry white wine (could sub water for this)
Once the above ingredients are well combined, pour over the chicken in the slow cooker.
Let it cook on low for 8 hours or high for 5-6 hours.
Serve over angel hair pasta.

Granted, this is definitely not a low-calorie dish, but trust me, it is so heavenly... you'll know why they call it "Angel" chicken.

I love serving this, along with a big salad for company because I'm not stuck in the kitchen prepping food. The only thing you have to do at the end is cook the pasta. Super simple. Super delish. I hope you'll try it soon and let me know how you like it!

Monday, January 5, 2015

New Year, New Recipes... Healthy 3-Ingredient Pasta

Living in a house full of boys can be a tad bit challenging when it comes to trying out new recipes.

So, I asked my 9-year old to browse online with me and see what "looked good" to him. I figured if it appealed to his eyes, he would be far more likely to try it when it arrived on his plate.

I Googled "Ground turkey recipes" and the first one that he said, "That looks good"... we tried.

It's original name was "Ground Turkey Broccoli Pasta" but that doesn't have quite the "ring to it" that I was looking for, so I've renamed it "Healthy 3-Ingredient Pasta" (even though there's a few more ingredients if you count things like EVOO, salt and pepper. :)

The good news is, my boys LOVED it! Payton even wanted a second helping, which I count as a home run in my recipe book.

The only time-consuming step was roasting the broccoli, which is really easy, but just takes a little prep time. You could also boil the broccoli along with the pasta, which would cut out some time, but would also cut out a lot of flavor.

Either way, here are the ingredients and steps to this very simple, delicious meal:


Ingredients:

  • 1 head of raw broccoli
  • 1 box of bow tie, orecchiette, or spiral pasta
  • 1 lb. ground turkey breast
  • EVOO
  • Garlic
  • Salt & pepper
  • Fresh grated Parmesan
  • Red pepper flakes (optional)


Directions:

  1. Cut the broccoli florets off the stems and place on a baking sheet, drizzle with EVOO and salt. Roast at 450 degrees for 20 minutes. Set aside. (This can be done early in the day and saved in the fridge until dinnertime).
  2. Boil pasta according to package directions, BUT RESERVE 1/4 cup pasta water before you drain it.
  3. Brown ground turkey breast and 1-2 cloves of diced garlic in 2 tablespoons of EVOO until browned.
  4. Combine cooked pasta, reserved pasta water, browned turkey and roasted broccoli in pan and sprinkle generously with salt, pepper and 2 tablespoons of EVOO. Toss to combine and warm through.
  5. Serve in bowls topped with freshly grated Parmesan and red pepper flakes.
  6. Enjoy!!!


Thursday, November 20, 2014

Recipe: Cheddar Bacon Cornbread

We finally got some cold weather this week! Yahoo!

Of course it's going to be back in the 80's by this weekend, but for now, I'm taking every second to enjoy the chill in the air.

And nothing makes me want to bake more than cold weather.

I'm not sure if it's just the time of year, or truly the dropping temps, but I always feel more inclined to bake during the fall/winter months.

One of my favorite quick meals to make during a chilly day, is... chili! (Sorry for the bad pun).

I typically make my chili the traditional way with ground beef (grass-fed, pasture raised beef), canned kidney beans, a can of tomato sauce and the pre-packaged chili seasoning. It just doesn't get any simpler than that!

I cook up the beef and then throw everything in the Crock Pot so it bubbles and simmers all day. And while I'm messin up the kitchen, I go ahead and grate the cheese, cut up jalapenos, or anything else I'm serving as toppings and put them in the fridge for later.

Then, when the "witching hour" hits and everyone is hungry, there's nothing for me to do except pour a glass of wine and dish out the chili. Voila!

This last particular time I made chili, it was quite rainy out and a cold front was moving through so I decided to make corn bread. But I'm never happy with the way the boxed cornbread mix turns out - it's always kinda dry and tasteless.

So I went on a hunt for a fairly simple cornbread recipe that sounded good.

Let me tell you, I'll never buy the store-bought packages of cornbread mix again!

To be fair, I did combine a couple of recipes.

This recipe and blog post from "Not Just Baked," gives great information on how to keep your cornbread fluffy and moist. She seemed like she really knew what she was talking about so I went with it. And it turned out excellent!

However, I wanted to give mine a little extra "Oomph" so I added a 1/2 cup of grated extra sharp cheddar cheese and a healthy handful of cooked, crumbled bacon (my mouth is watering just thinking about it).


The result... the most delicious, moist cornbread I've ever made. It had so much flavor between the sweetness of the cornbread, the saltiness of the bacon and the sharpness of the cheese... perfection.

So, the next time you make chili (or anything Southwestern-y) I highly recommend trying out this recipe. You will not be disappointed!

Monday, November 10, 2014

Fall Recipe: Beef, Bacon & Mushroom Ragu

I have been meaning to post this delectable recipe for about a month now, but life has been a tad bit busy.

But before fall slips between our fingertips, I want to make sure you have access to this amazing dish that is just perfect for the cool temps we get to enjoy this time of year.

This dish takes a little bit of prep work, but the resulting dish is so full of flavors, it's totally worth it. Just put on some good music, poor yourself a glass of wine and enjoy the cooking process.

Ingredients:

  • 2 tbsp. EVOO
  • 1/4 lb. bacon, chopped
  • 1/4 lb. mushrooms, chopped
  • 2 tbsp. chopped fresh thyme
  • 1 bay leaf
  • 1 lb. ground beef
  • 1 medium white onion, minced
  • 2-3 large cloves of garlic, minced
  • Salt & Pepper
  • 3 tbsp. tomato paste
  • 2 cups beef stock
  • 1 lb. ziti or mastacholi noodles
  • 2 tbsp. butter
  • Freshly grated Parmesan cheese

Instructions:
  1. Bring a large pot of water to a boil.
  2. In a deep skillet, heat the EVOO over medium-high heat. Add bacon and cook until it starts turning crisp, about 4 minutes. Add the mushrooms, thyme, and bay leaf. Cook together until the mushrooms brown, about 3-5 minutes.
  3. Add the ground beef and cook until browned. Add the onion, garlic, and season with salt & pepper.
  4. Partially cover the skillet and cook, stirring occasionally until the onion softens, 5-6 minutes.
  5. Add the tomato paste and stir until you can smell it, about 1 minutes.
  6. Stir in the beef stock, and reduce heat to low and let it simmer while you cook your pasta.
  7. Reserve about 1/4 cup of the pasta water, then drain the pasta.
  8. Put the reserved water back in the pasta pot, with the drained pasta.
  9. Add the butter and ragu and stir completely.
  10. Serve in shallow bowls, topped with freshly grated cheese.
Of course I had to pick out all the mushrooms before serving it to my guys (more for me!), but it was still a huge hit! 

I hope you'll make this the next time you're in the mood for a warm, comforting meal that satisfies the entire family. Bon Appetite!